Coffee maker
AeroPress
A portable manual brewer combining brief immersion with gentle pressure, producing a clean cup across a wide adjustable strength range.
In short
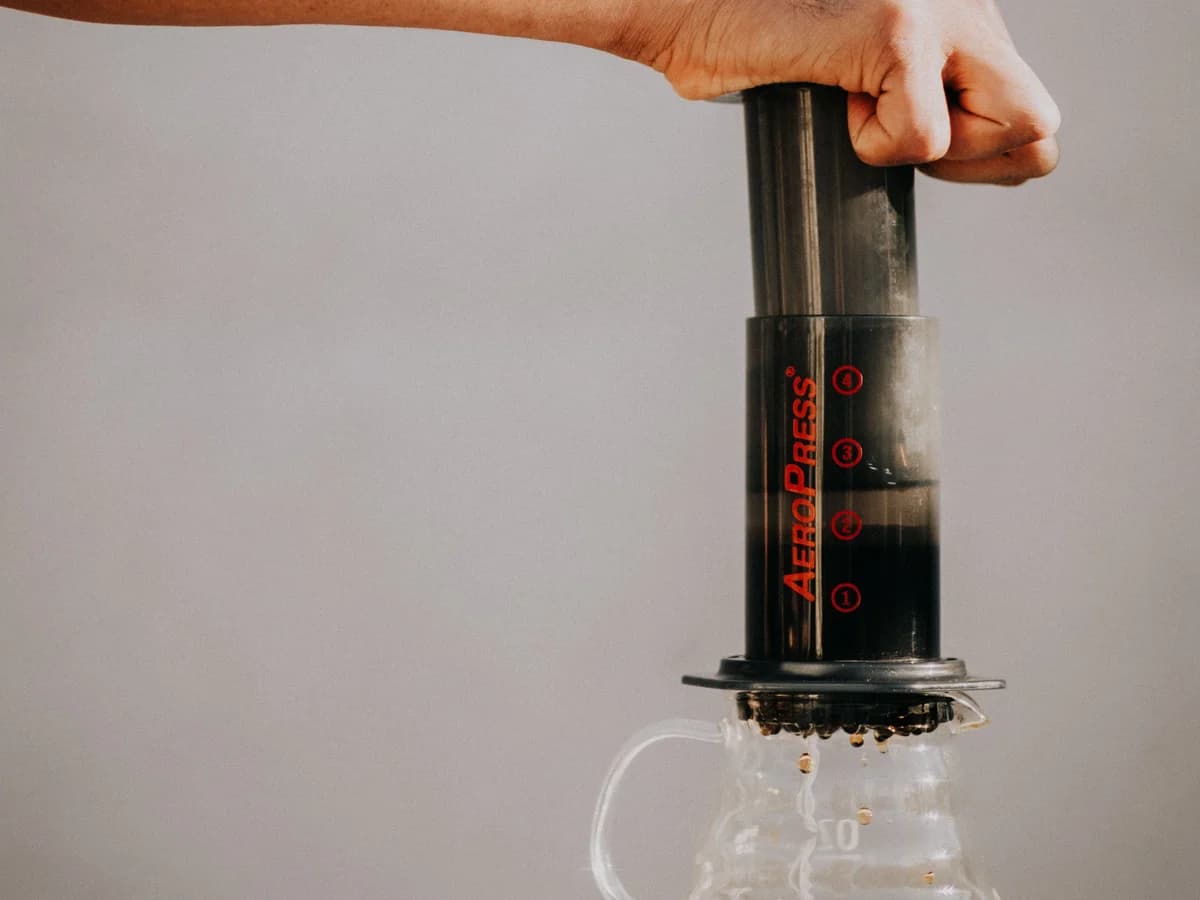
An AeroPress is a plastic chamber, a plunger with a rubber-like seal, and a perforated cap that holds a small round filter. Coffee steeps in the chamber and is then pushed through the filter by hand. That is the whole device, which is why it survives being dropped, packed in a bag and used on a campsite.
The thing to understand before buying one is its size. It makes one mug at a time. Everything else about it is flexible.
The versions, and what really differs
Widely documented
- Standard size
- The original format. It presses directly into most mugs and has the widest choice of filters and accessories made for it.
- Travel size
- A shorter chamber that packs into its own cup. It brews a little less per press, which matters if you like a full mug without diluting.
- Large size
- A bigger chamber intended for two cups. It needs its own, larger filters and a vessel wide and sturdy enough to press into.
- Clear and premium-material versions
- These change what the chamber is made of, not how the coffee is brewed. Choose them for looks or for a preference about materials, not for a different cup.
Paper discs, metal discs and flow-control caps
Tendency, not a guarantee
The standard paper filter is cheap, compostable and gives a clean cup with almost no sediment. A reusable metal disc lets more oil and fine particles through, so the coffee is heavier in the mouth and slightly cloudy. Neither is better; they are different drinks from the same brewer.
The standard cap lets coffee begin dripping as soon as water is added. Caps with a pressure-actuated valve hold the liquid back until you press, which removes the reason many people brew with the device upside down. If the dripping bothers you, that accessory solves it more safely than inverting.
The one part that wears
Widely documented
The plunger seal is what makes the device work, and it is the only part that normally needs replacing. A worn seal lets air or liquid past, so the plunger sinks with no resistance. Replacement seals are sold separately.
Older versions had a natural rubber seal that wore faster if it was stored squeezed inside the chamber, which is where the advice to push the plunger all the way through after rinsing comes from. The maker says the silicone seal fitted to current versions does not fatigue under compression and can be stored inside the chamber. Pushing the plunger through still does no harm, and it ejects the spent coffee. For cleaning, the maker describes a rinse as sufficient day to day and says most versions can go in the top rack of a dishwasher, with at least one premium-material version hand-wash only; check which you have.
What you need besides the brewer
CoffeeHQ explanation
- A way to heat water. Any kettle works. A pouring kettle with a fine spout is not needed, because the water is poured in all at once rather than in a controlled stream.
- A sturdy mug or server. You press down with some force. Use a solid mug on a stable surface, and avoid thin glass or anything narrower than the brewer's base.
- Ground coffee, and ideally a grinder. It tolerates a wide range of grinds, so pre-ground filter coffee works. A grinder becomes worthwhile when you want to adjust the cup, since grind is the main lever.
- A scale, eventually. The numbered markings on the chamber are a rough guide. Weighing coffee and water is what makes a good cup repeatable.
Problems that belong to the device, not the recipe
CoffeeHQ explanation
- The plunger drops with no resistance
Usually because: The seal is worn, or on an older rubber-sealed version has lost its shape from being stored compressed.
Change first: Replace the seal.
- Pressing is very hard or stalls
Usually because: The grind is too fine for the amount of coffee, so the bed is choking the filter.
Change first: Grind coarser rather than pressing harder.
- Coffee runs through before you are ready
Usually because: The standard cap does not hold liquid back, and a coarse grind lets it through fast.
Change first: Insert the plunger a little way to create a vacuum, or use a flow-control cap.
- Hot water spills when brewing inverted
Usually because: The inverted position is top-heavy and relies on the seal holding.
Change first: Brew upright. The maker strongly discourages the inverted method because of the risk of burns from hot liquid; a flow-control cap gives the same long steep without it.
When a different brewer is the better buy
CoffeeHQ explanation
- French press — Makes several cups at once and needs no paper filters, at the cost of a heavier, more sedimented cup and more cleaning.
- Pour-over dripper — Gives more clarity and scales to two or three cups, but asks for a pouring kettle and more attention to technique.
- Moka pot — Closer to espresso in strength and needs no filters at all, though it is less forgiving and tied to a hob.
What to do next
- How to brew with an AeroPress — The recipe, the technique and what to change when the cup is not right.
- AeroPress vs French press — The closest alternative, compared on what ends up in the cup.
- Paper vs metal filter — What the choice of disc changes, explained in full.
- Coffee-maker selector — If one mug at a time may not be enough for your household.
- Become a barista — A structured programme from dose and grind through milk, drinks and maintenance.
How it works
Coffee steeps briefly with water in a chamber, then the user presses a plunger to force it through a paper or metal filter into a cup or carafe.
Who it suits
- travellers wanting a compact, durable brewer
- beginners wanting quick, adjustable results
- campers and outdoor use
Who it may not suit
- users wanting to brew many cups at once (typically single-serving)
- Starting dose
- 15g
- Starting water
- 200ml
- Coffee-to-water ratio
- 60–80 g per litre (typically 70)
- Grind
- Medium-fine, adjustable depending on recipe and steep time.
- Capacity
- 1 cup
- Brew time
- 2-3 min
- Skill level
- beginner
- Noise
- quiet
- Space
- compact
- Cleaning burden
- low
- Convenience
- high
- Manual control
- medium
Descriptive grind labels like this are illustrative starting points, not precise measurements — the same label can mean different particle sizes on different grinders. See the grind size guide for how to dial this in on your own equipment.
Uses the AeroPress brewing method.
Equipment
Requires a separate grinder.
Advantages
- highly portable and durable
- wide adjustable strength range
- fast cleanup
Disadvantages
- single-serving only
- requires paper filters as an ongoing consumable (unless using a reusable metal filter)
Steps
- Insert a filter into the cap, twist the cap onto the chamber and stand it on a sturdy mug.
- Add ground coffee to the chamber and pour in water.
- Stir gently, insert the plunger a little way to stop the drip, and wait: the maker's own recipe waits 30 to 60 seconds depending on the grind.
- Press gently and steadily until the hiss ends; the maker says not to push hard.
Cleaning & maintenance
Eject the used puck and rinse the plunger seal after each use.
Replace the plunger seal periodically as it wears.
Consumables: paper filters (or a reusable metal filter), replacement plunger seal (occasional)
Common faults
- weak coffee if under-steeped
- bitter coffee if brewed too strong or steeped too long
Cost
Purchase cost band: budgetConsistently positioned as an affordable, widely available brewer.
Low ongoing cost — beans and inexpensive paper filters.
Suitable roast levels
Skills for this machine
The individual techniques this device asks of you, each with its own adjustments and failure modes.
Compare
Related guides
Not sure if this is right for you? Try the coffee-maker selector.